- Home
- Services
- IVY
- Portfolio
- Game Dev
- Blogs
- About Us
- Contact Us
- Sun-Tue (9:00 am-7.00 pm)
- infoaploxn@gmail.com
- +91 656 786 53
Let’s face it: keeping a software development team motivated isn’t just about fancy coffee machines or free snacks (though, hey, those don’t hurt). It’s about something deeper. It’s about understanding what makes developers tick—and what makes them pack up their desks and look for the exit. (Text with Topic/heading)
Whether it’s the thrill of solving complex problems, getting a pat on the back for a job well done, or just being able to shut the laptop at 6 PM without guilt, motivation is the secret sauce of any successful software house. But, as we all know, every coin has two sides. For every motivating factor, there’s a demotivator lurking in the shadows, ready to sap energy and enthusiasm.
In this blog, we’ll dive into what keeps software teams inspired and explore the challenges that sometimes make them feel stuck.
First up, let’s talk about what makes developers want to show up every day and dive into lines of code. It’s not just the paycheck (though that’s important too). It’s the stuff that gives them a sense of purpose and pride.
Developers thrives the most when they are challenged. Tackling a complex problem, brainstorming innovative ideas or experimenting solutions, this makes work feel exciting to them.
When the vibe is right, people groove! Developer feeds on the success of their code, when they get the credit for what they have done without their team leads stomping on their back. A place where developers are encouraged to be original, creative without being micromanaged, this is where they thrive.
The tech industry is a forever growing world at the speed of light. To keep up with their surrounding, developers need to learn and keep themselves at par against others. Whether its a new programming language, a new learning tool or a course on personal development, opportunities to learn and grow are major motivators for them.
It’s amazing that how recognizing them with simple words of affirmation like “excellent job” can do. Public shoutouts in a meeting, or during a standup or even in Microsoft teams/slack channel, these small things matter a lot for them.
You should see the shine in developers’ eye when they know what impact they are making. Whether it’s improving a user experience for an application or a website, solving a customer pain point or launching a product that would be used by thousands or millions of people, a good idea is what keeps them motivated.
Now, let’s flip the coin. Even the most talented, passionate developer can lose their spark if the work environment starts to feel like a bad episode of "The Office."
If you want to give someone wings, give them red bull but if you want to cut them, micromanagement can do that for you. Nothing kills your creativity more quickly than someone glancing over your shoulder all the time. Developers need room to research, experiment, and solve the problems without having gun on their head.
Have you ever tried hitting a moving target? This is what it feels when you’re working on a project which has no clear goals or when scope of work keeps changing without a clear plan. Developer wants clarity not chaos.
The biggest challenge we have seen in a software house is setting unrealistic deadlines. Sitting late hours in office is fine when it’s a rare occurrence, but if it becomes a nagging habit, somethings need to change!
If developers think that their career is on a ship moving only with the direction of waves with no clear path or goal, they might take a dive. People want to grow in their professional life, whether it is by learning new skills, taking on leadership roles or facing new challenges. If there’s nothing that pushes them to grow, they might start looking elsewhere.
Toxic Work Environments:
If workplace feels more like fighting ring than a team, motivation fades. Favouritism, Biasness towards employees, targeting individuals, office politics and lack of supports can make a person hate their job even if its great.
So, how can software houses can hit a home run finding the perfect balance between motivating their employees without falling into the pitfalls? Here are some tried-and-tested tips:
1. Listen and Learn: You don’t have to be a mind reader. Create a safe space where they can share what’s working, what’s not, and what’s been bugging them. Sometimes, just knowing someone’s listening can make all the difference.
3. Encourage Flexibility: Who doesn’t love a bit of freedom? Offering remote work options or flexible hours can keep employees feeling refreshed and motivated. Of course, balance is key—nobody wants to see flexibility being exploited. When done right, it’s a game-changer.
At the end of the day, motivation in a software house isn’t rocket science—it’s about treating developers like the creative, driven individuals they are. Give them the tools, trust, and opportunities to shine, and they’ll do amazing things. Ignore the warning signs of burnout or frustration, and you’ll see even the best talent head for the door.
So, what are you doing to keep developers inspired? If you’re not sure, it might be time for a little soul-searching—and maybe an extra coffee machine, just in case.
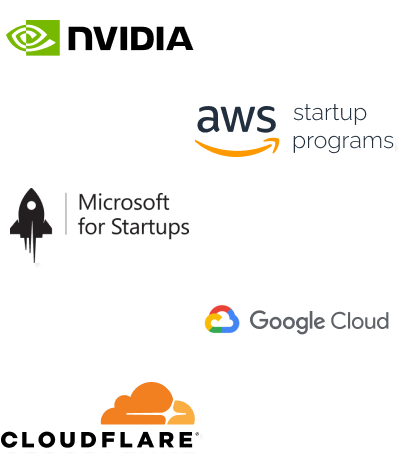
Imagine reducing your operational costs by up to $100,000 annually without compromising on the technology you rely on. Through our partnerships with leading cloud and technology providers like AWS (Amazon Web Services), Google Cloud Platform (GCP), Microsoft Azure, and Nvidia Inception, we can help you secure up to $25,000 in credits over two years (subject to approval).
These credits can cover essential server fees and offer additional perks, such as:
By leveraging these credits, you can significantly optimize your operational expenses. Whether you're a startup or a growing business, the savings from these partnerships ranging from $5,000 to $100,000 annually can make a huge difference in scaling your business efficiently.
The approval process requires company registration and meeting specific requirements, but we provide full support to guide you through every step. Start saving on your cloud infrastructure today and unlock the full potential of your business.