- Home
- Services
- IVY
- Portfolio
- Game Dev
- Blogs
- About Us
- Contact Us
- Sun-Tue (9:00 am-7.00 pm)
- infoaploxn@gmail.com
- +91 656 786 53
When developing iOS applications with Flutter, managing permissions is crucial to ensuring a smooth and secure user experience. Permissions are what allow your app to access sensitive features like the camera, microphone, and location. If handled improperly, it can not only lead to crashes but also get your app rejected from the App Store. In this post, I’ll walk you through how I approach permission management in Xcode, sharing some examples and best practices that have worked well for me.
In iOS, permissions are managed through the Info.plist file, where you need to declare the reasons your app needs access to sensitive user data. Apple is very strict about this. They require you to explicitly state the purpose for each permission request, and this transparency is essential for user trust and meeting Apple’s privacy guidelines.
For example, if your app needs location access, you’ll need to add a key like NSLocationWhenInUseUsageDescription in your Info.plist file, and here’s how I usually configure it:
<key>NSLocationWhenInUseUsageDescription</key>
<string>We use your location to provide personalized recommendations based on your area.</string>
To update your Info.plist in Xcode:
Remember, each permission must come with a clear, concise description that tells the user why it’s needed. If you miss this step, your app might be rejected during the App Store review.
Flutter has made permission management easy with several packages, with permissionhandler being one of the most popular ones. This package simplifies the process of checking and requesting permissions within your Flutter code.
First, add the permissionhandler package to your pubspec.yaml file:
dependencies:
  permission_handler: ^11.1.0
Then, you can integrate it into your Flutter app. Here’s an example of how I request camera permission:
import ’package:permissionhandler/permissionhandler.dart’;

Future<void> requestCameraPermission() async {
  var status = await Permission.camera.status;
  if (status.isDenied) {
    // Request permission
    if (await Permission.camera.request().isGranted) {
      print(’Camera permission granted’);
    } else {
      print(’Camera permission denied’);
    }
  } else if (status.isPermanentlyDenied) {
    // Redirect user to app settings
    openAppSettings();
  }
}
In this code, I first check the current camera permission status. If it’s denied, I request permission. If it’s permanently denied (like if the user chose "Don’t ask again"), I send them to the app settings to enable it manually.
A key takeaway here is to always request permissions contextually. For example, if the camera is only needed when the user uploads a profile picture, don’t ask for it on app launch. This approach is clearer for users and increases the chances they’ll grant the permissions.
One thing I’ve learned is that permission configurations sometimes behave differently across Xcode versions. In some cases, settings in the Info.plist file may not work as expected. To address this, I define permissions directly in the Podfile, which ensures more consistent behavior during the build process.
Here’s how I define permissions in the Podfile:
post_install do |installer|
  installer.pods_project.targets.each do |target|
    flutteradditionaliosbuildsettings(target)
    target.build_configurations.each do |config|
      config.buildsettings[’GCCPREPROCESSOR_DEFINITIONS’] ||= [
        ’$(inherited)’,
        ’PERMISSION_MICROPHONE=1’,
        ’PERMISSIONSPEECHRECOGNIZER=1’,
        ’PERMISSION_CAMERA=1’,
        ’PERMISSION_PHOTOS=1’,
      ]
    end
  end
end
This ensures that the necessary permissions are clearly defined during the build process, reducing the chances of running into unexpected issues across different Xcode versions.
To implement this:
Before submitting your app to the App Store, thoroughly testing permission handling is essential. I’ve found that Xcode’s simulator is a great tool for this. You can simulate different permission states, such as granting, denying, or revoking access, and see how your app responds.
To test permissions:
For example, I might simulate a denied camera permission and check if my app displays an appropriate message to the user.
You can also write unit tests to verify your permission handling. Flutter’s testing framework allows you to mock permissions and simulate different states to test expected behaviors. Here’s a simple test example:
test(’Should request and grant camera permission’, () async {
  // Mock permission handler
  Permission.camera = MockPermissionHandler();

  // Simulate permission granted
  when(() => Permission.camera.request()).thenAnswer((_) async => PermissionStatus.granted);

  // Call the function
  await requestCameraPermission();

  // Verify the expected behavior
  verify(() => Permission.camera.request()).called(1);
});
Managing permissions effectively in iOS for Flutter involves a mix of correctly configuring the Info.plist file, using trusted permission-handling packages like permission_handler, and testing thoroughly. By also defining permissions in the Podfile, I ensure that permission handling remains consistent across different versions of Xcode. Following Apple’s guidelines and best practices not only keeps the app submission process smooth but also builds trust with users. Always make sure to be transparent and clear when requesting permissions, as it greatly improves user experience and engagement.
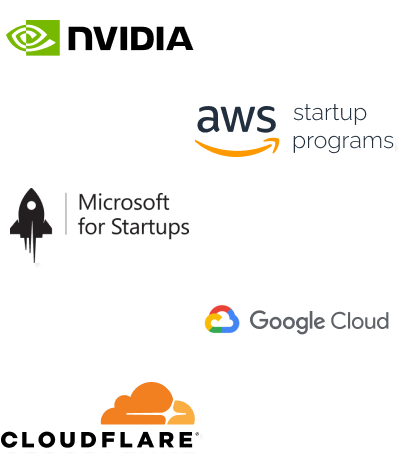
Imagine reducing your operational costs by up to $100,000 annually without compromising on the technology you rely on. Through our partnerships with leading cloud and technology providers like AWS (Amazon Web Services), Google Cloud Platform (GCP), Microsoft Azure, and Nvidia Inception, we can help you secure up to $25,000 in credits over two years (subject to approval).
These credits can cover essential server fees and offer additional perks, such as:
By leveraging these credits, you can significantly optimize your operational expenses. Whether you're a startup or a growing business, the savings from these partnerships ranging from $5,000 to $100,000 annually can make a huge difference in scaling your business efficiently.
The approval process requires company registration and meeting specific requirements, but we provide full support to guide you through every step. Start saving on your cloud infrastructure today and unlock the full potential of your business.